Fruit tree maintenance
Some basic fruit tree maintenance to get a good crop of fruit
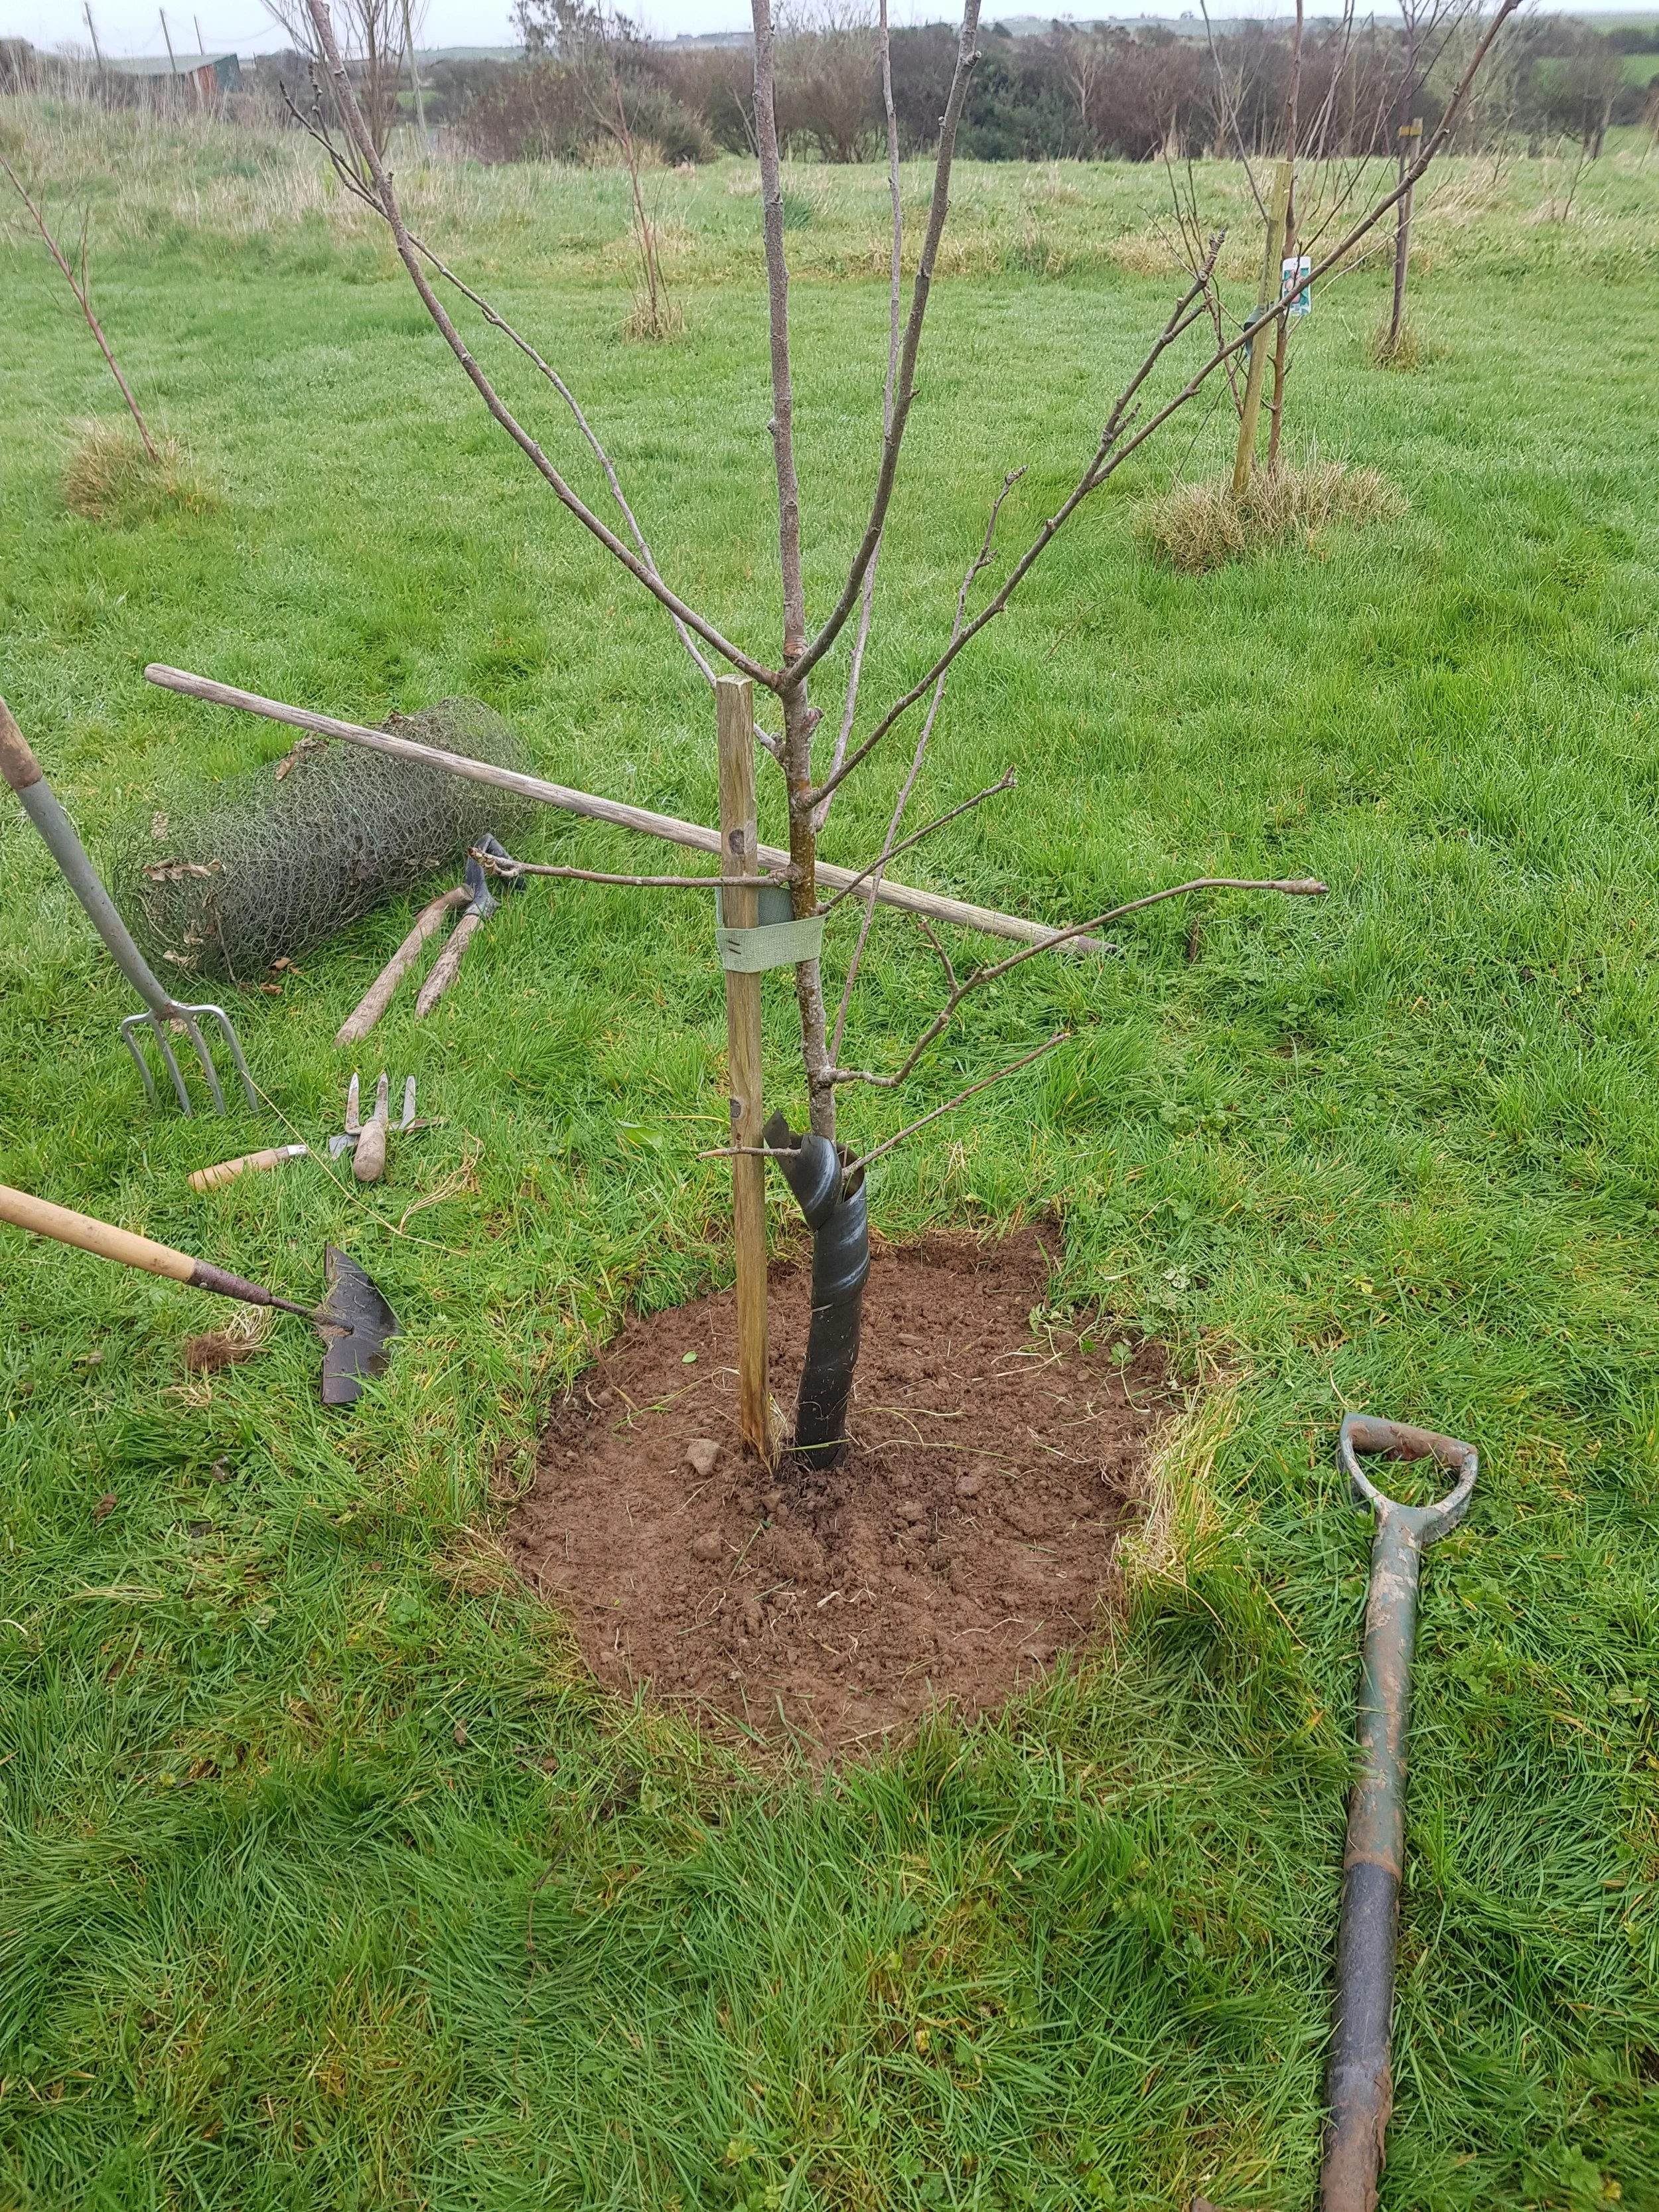
There are loads of jobs that need doing as winter turns to spring, one of those is maintaining your fruit trees. These are some young trees (3-4 years old) that require a bit of attention if they’re to thrive, at the minute they’re struggling. One of the biggest threats to fruit trees as they establish themselves is grass, they have a lot of their roots near the surface which puts them in competition with the grass and can knock them right back. As you can see in this example the grass is taking over and if you strim it then you risk damaging the trunk. The best thing to do is to clear an area around the tree by carefully removing the grass, then to keep it away we like to lay some cardboard down and cover with a mulch - this will also feed the tree over time. For a feed in the short term a sprinkling of blood and bonemeal around the tree in early spring followed by some well rotted manure or compost in April will work wonders, just be sure to keep the area around the trunk clear.
These also had a few other issues that needed addressing. There are hares and rabbit in the area and there was evidence of bark nibbling on those trees without guards, sadly a couple were too far gone but the rest had new guards installed. It’s a windy site and the stakes had had their day, some were also badly positioned and rubbing the bark on the trees, where bark is rubbed away it can lead to disease entering the tree. So new stakes and ties were fitted. None of these trees needed a shaping prune yet but there were a couple with shoots coming from below the graft. This can happen on younger trees and these shoots need to be removed as they are from the rootstock below the graft (the rootstock will be from a different variety) and can take over.
Some basic maintenance such as this can be undertaken by anyone and the trees will really benefit from it. Pruning is a little more complicated but isn’t the mystery that people often think it is, though feel free to get in touch if you’d like some advice.

Don’t tidy your garden
Want a more nature friendly garden? Want to know how to help the insects? We explore how keeping your garden slightly messy is an important part of making it nature friendly
It’s nearly the end of summer, many of the blooms have finished and the garden is starting to look a little messy. The temptation is there to whip out the snippers and trim back all the dead flowers and brown stems, but don’t, messy is good. If you’ve grown wildflowers or poppies for instance then you need to let them set seed and for that seed to fall on the ground for next year’s flowers. Many other plants have seeds that birds need for food and by removing the seed heads you’re taking away a valuable food source.
The stems and stalks of plants are also much needed habitat for a range of insects and our insects need all the help they can get right now. As the leaves fall and the herbaceous plants start to decay you get a natural covering of organic matter on the soil, this helps protect it from winter rains that would otherwise leach nutrients away and the leaves are also taken into the ground by earthworms so you get the soil improved for free. This surface material also provides another habitat for a range of small animals and you’ll see blackbirds in particular flinging it around with gusto as they search for food.
For us humans the urge to tidy things is a strong one and for years the gardening message has been to have an autumn tidy up and “put the garden to bed for the winter”. Nature however isn’t tidy and we need to learn what is best for our wildlife, so as the beauty of our summer flowers fades away we can appreciate a new beauty, that of birds and other animals feeding on the summer bounty. So save yourself a job, leave the decaying plants where they are and clear away what remains of them in spring, once the new growth is just starting to appear, your garden will be much better for it.

Using and making compost
What is compost and why is it important? Find out about different types, what to avoid and how to start making your own
Spring is here (just about!) when the gardener’s thoughts turn to planting and, especially if you use pots or containers, what to plant them in. Which means compost. If you’re new to gardening then compost is compost isn’t it? Look more closely though and you’ll see there are loads of varieties - sowing, potting, garden, manure, peat, peat free and so on. They’re all decomposed or partly decomposed organic matter but what they’re made from is important, seed compost is fine texture and has few nutrients, potting compost is a bit bulkier and has slow release nutrients, mulch is quite coarse and often has woodchip in and manure based composts are rich in nutrients and great for veggies and hungry plants.
The big thing to look out for though is that any compost you buy has the magic words peat free on it, not reduced peat but peat free. Peat has been used as the base for most composts for the last 60 years or so and we’ve become addicted to it, but it needs to stay in the ground where it absorbs carbon dioxide and holds water, helping to prevent floods. There are some great peat free composts available and they get better every year.
Even better than that is making your own compost, there is no witchcraft involved, just adding a balance of plant material and giving it a turn or mix every few weeks. It’s great for the environment as no fossil fuels are used to move or process your garden waste, you recycle nutrients in the garden, it creates new wildlife habitat and to top it all it’s free. The key is not having too much green material like grass clippings (you get a wet slimy mess) or too much brown material like stems, twigs and leaves (it will be too dry and never get going), about 50:50 is what you’re aiming for. Depending on how much you add, how often you turn it, time of year and a few other variables it will take anything from 2-6 months in most cases to get usable compost; the longer you can leave it the better it will be.
If you’re a bit unsure there is loads of info on the web or we can come out to see you, we’ll find the system that works best for you and get you composting in no time.

Harvesting water with a butt
Why you should have water butts to collect rain water in your garden, what types there are, where to put them and how to use them
Water is required for all life and is a very precious resource, yet in the maritime climate of Britain and Ireland it’s something we often take for granted, I mean, it rains all the time doesn’t it? Well, it doesn’t and rainfall levels vary immensely, the west coast of Ireland receives approximately half as much rain again as places on the east coast. The water that comes out of your tap, whether from well, spring or mains, has needed energy to transport and purify it and that energy is usually derived from fossil fuels. In addition the effects of climate change have disturbed rainfall patterns, we are increasingly seeing dry springs, summer droughts and more intense torrential downpours. So we cannot rely on a steady supply of water, even in Ireland!
So with all of that in mind it makes sense for us to harvest rainfall for use in the garden, it’s crazy to use purified water for watering your plants – and they don’t like it either. This means you need a water butt, or ideally, water butts. When it comes to rainfall harvesting bigger is almost always better, you’ll be amazed how quickly you can drain a large water butt (300 litre) in a hot, dry spell. They can also fill very quickly, we had a slim 100 litre wall-mounted butt that could fill from empty in 10 minutes during a heavy rainstorm.
Where able site your butts next to every gutter downpipe to collect as much as you can, if that’s not possible or practical then either get a very large butt or a series of butts linked together. You can get butts of 1000 litres or more that sit above ground, though some of those aren’t easy on the eye and are best saved for a quiet corner or in a place where you disguise them – grow a climbing plant up them for instance. There are some very big tanks that you can site underground (3000 litres), so if you’re thinking of having a patio laid or some decking, then you can bury one of these underneath. You’ll then need to pump the water out which can be via mains or solar power or a mechanical pump if you’re feeling very energetic!
You also need to think about where you’re going to use the water and how you’re going to transport it, though realistically it’s going to be close to a downpipe unless you’re skilled at making aqueducts. Many gardeners have a butt next to their shed or greenhouse that has a removable lid and wide opening so that they can quickly dip their watering can in. If you can mount your butt high enough (safely as they’re very heavy when full) so that you can attach a hose to it and water your plants with ease. Most though will be on a stand that you place a watering can underneath to be filled by a tap, it’s a bit slower but it does teach you to value your water when you have to carry it around the garden.
In the winter you’ll usually find that your butts are full and the excess water goes down the drain, so instead of watering your plants you can use it to wash your car or even flush the toilet if you put it in a bucket – why use purified water to flush a toilet!
Butts come in all shapes and sizes with some designed to be disguised as a garden feature, they also fit a range of budgets and increasingly they’re being made from recycled plastic. Installing them is straightforward and can be fitted by a DIYer, if you don’t feel confident then a handyman will be happy to do it for you.
What are you waiting for? Get off your butt and get a butt

Using wood ash in your garden
Find out how to take waste wood ash from your fire and use it in your garden. What impact does it have, which plants benefit from it, the plants to avoid and what types of ash shouldn’t be used.
We hate waste and will try to avoid putting things in the bin wherever we can. At this time of year lots of people will be lighting fires in the home to keep warm, if you’re burning wood only and not coal then you can use your ash. Wood ash contains potassium and phosphorous which is needed by plants for flowering and fruiting, plus other trace elements. If you have a slightly acidic soil then it can be used in place of lime to bring the pH up, as wood ash is alkaline. For that reason you should avoid putting it around plants that like acid soil like blueberries, camellias and some fruit trees, you should also keep it away from your spuds as it can encourage scab.
The others will love it though and you can sprinkle a thin layer around your plants and on your veg beds. A little goes a long way and you may find you still have some left, in which case you can add it your compost heap. Not only will it add nutrients but heaps tend to be slightly acidic and ash balances out the pH of your heap (the same goes for manure, which is also slightly acidic). Just add a little at a time as you’re putting material in there. You can then take satisfaction from knowing that you’ve taken a waste product and used it as a valuable fertiliser to make your garden better.
You might not be sure what the pH of your soil is, but it’s certainly worth finding out as some plants won’t grow well in acid or alkaline soils. You can get tests to find out or if you’re not sure about it get in touch with us, we test the pH at different points in your garden when we come and do a site survey and consultation.

Reusing materials in the garden
Reusing waste materials in the garden. Live more sustainably by making things from stuff you might have thrown away. How to make a garden path out of old bricks
Permaculture and reuse are important parts of our lives, we hate throwing anything away. So when we had an extension to the house we looked at all these great bricks from the old wall and wondered what we could do with them. They were diverted from the skip and when I redesigned the garden I put this path in using the them.
I looked at the desire line from house to patio, to veg beds, compost heaps and shed, laid it out with markers and put in gentle curves for looks and interest. Once happy they were installed, they're only set on sand so don't have to be permanent, meaning they can be moved or removed easily in the future. This also avoided the use of concrete, keeping the energy used low. They are very hard wearing, look great and will bed in wonderfully over time. Maintenance is also simple, if a brick gets damaged then just pop it out and replace, or if the other side is okay just flip it over.

Creating wildlife habitat in your garden
How to create wildlife habitat from waste wood in your garden. Learn why this is important and how it benefits you and your plants
Late winter is an opportunity to get out in the garden (when it’s not raining) and do some pruning of trees, before the sap starts to rise in spring. But what to do with the woody waste you’ve now made? It can be tempting to take it to the tip or throw it in your garden waste bin but don’t, it can be used in the garden.
Chop or saw them into short lengths and find a quiet corner of the garden, perhaps one that is in shade and nothing really grows in. Then stack them into a pile and leave them, it’s as simple as that. You now have a habitat that will be colonised by frogs, newts, bees, spiders, countless insects and moss and fungi.
Any time something leaves your house or garden it requires fossil fuel to be dealt with or processed, keeping it in the garden avoids the use of fossil fuels and creates much needed habitat at the same time.